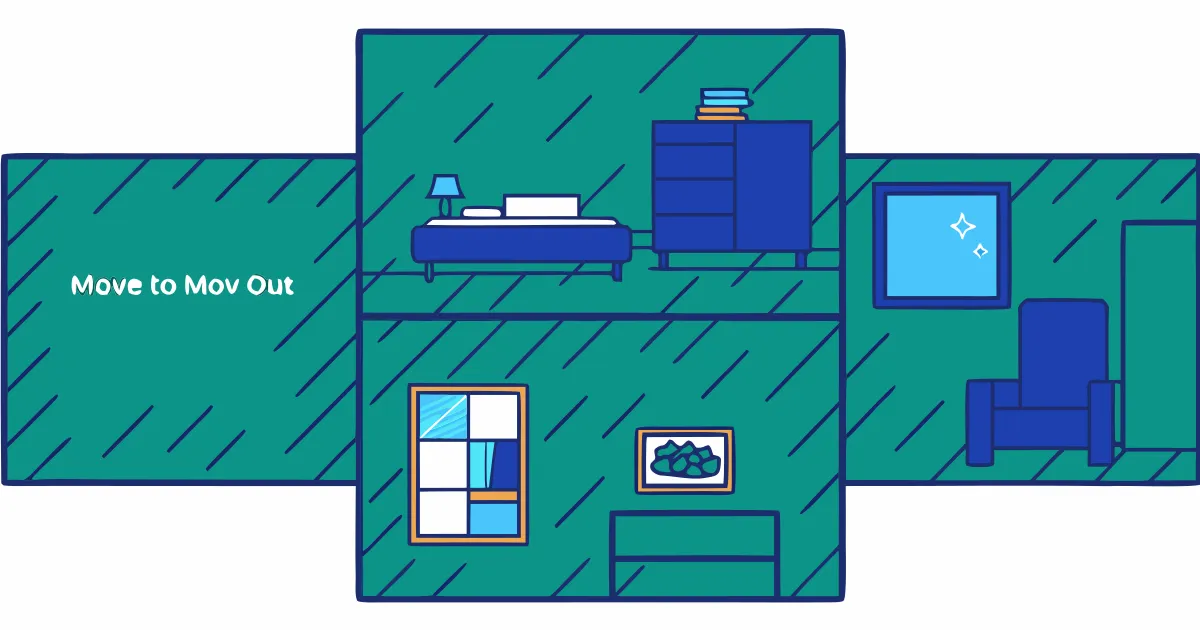
Essential Rental Inspection Photo Checklist
Table of Contents
- Introduction
- Why Photo Documentation Matters for Rental Inspections
- Best Practices for Taking Rental Inspection Photos
- Room-by-Room Photography Strategy
- Common Mistakes in Rental Photo Documentation
- Leveraging Technology for Better Documentation
- Legal Considerations and Security Deposit Protection
- Real-World Applications and Case Examples
- Final Thoughts
- Introduction
- Rental Property Move-In / Move-Out Inspection Checklist with Photos
- General Photography Tips (Apply to Every Room)
- Living Areas (Living Room, Dining Room, Hallways)
- Kitchen
- Bathrooms
- Bedrooms
- Other Areas and Systems
- Landlord-Specific Documentation
- Tenant-Specific Protection
- Why Photo Documentation Matters for Rental Inspections
- Best Practices for Taking Rental Inspection Photos
- Room-by-Room Photography Strategy
- Common Mistakes in Rental Photo Documentation
- Leveraging Technology for Better Documentation
- Legal Considerations and Security Deposit Protection
- Real-World Applications and Case Examples
- Final Thoughts
Introduction
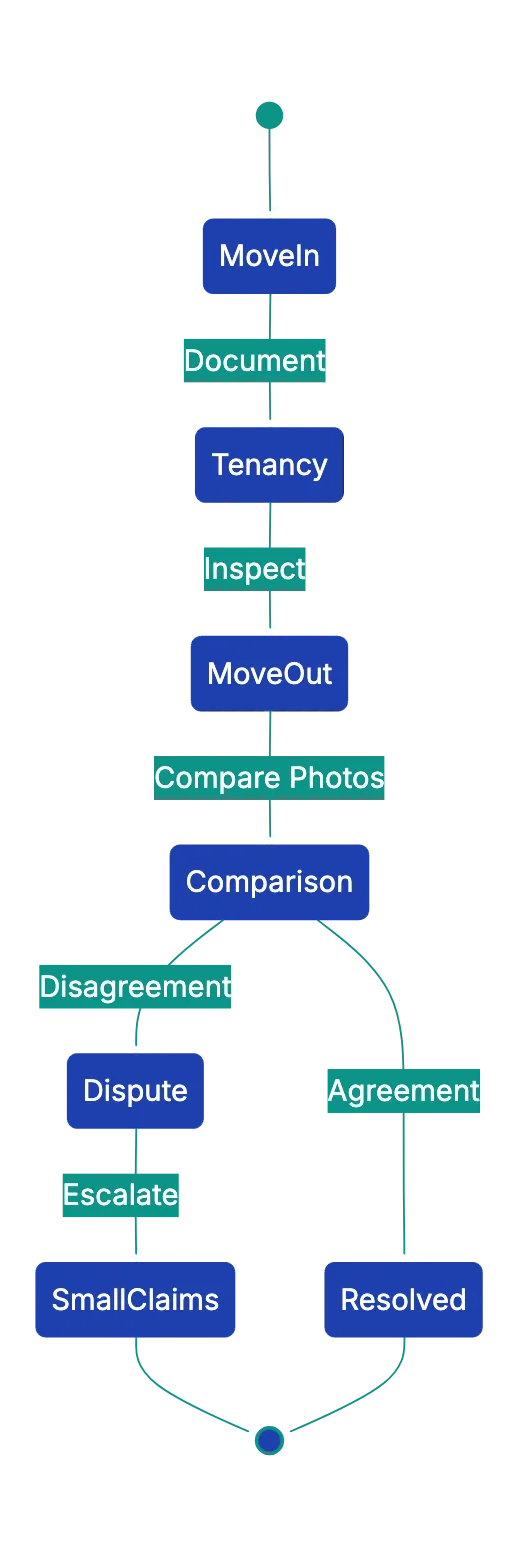
Security deposit disputes are among the most common conflicts between renters and landlords, with over 50% of tenants reporting some portion of their deposit withheld. The primary evidence in these disputes? Rental inspection photos. Whether you’re a tenant protecting your deposit or a landlord documenting property condition, thorough rental inspection photos, including move-in and move-out inspection photos, create an objective record that prevents misunderstandings and resolves disputes.
This checklist walks you through what to photograph, how to record images, and key details for documentation.
Security Deposit Dispute Resolution:
Why Photo Documentation Matters for Rental Inspections
Rental inspection photos, including move in inspection checklist photos, serve as objective evidence when memories fade and disputes arise. Security deposits average between one and two months’ rent, meaning a typical tenant has between $1,500 and $3,000 at stake.
Without clear photo documentation, which includes apartment condition photos, landlords often default to withholding portions of deposits for damage they believe occurred during the tenancy, while tenants struggle to prove the damage existed beforehand.
Documentation Workflow:

The legal framework in most states requires landlords to provide itemized deductions from security deposits within 14 to 60 days after move-out. When disputes reach small claims court, judges consistently favor the party with better documentation.
A study of small claims cases in California found that parties presenting timestamped photos won their cases 73% of the time, compared to only 42% for those relying on written descriptions alone.
Photo documentation protects both parties. Landlords benefit from clear apartment condition photos showing property condition before and after each tenancy, making it easier to distinguish normal wear and tear from tenant-caused damage. Tenants benefit from rental damage documentation photos proving damage existed before they moved in, protecting their deposits from unfair deductions.
The time investment is minimal compared to the financial protection it provides.
This mutual protection explains why property management companies now require complete documentation, reducing disputes significantly.
Best Practices for Taking Rental Inspection Photos
The quality of your photos determines their usefulness as evidence. Blurry, poorly lit, or incomplete photos won’t protect you when disputes arise. Start by ensuring adequate lighting in every shot of your rental inspection photos. Natural daylight produces the clearest images, so schedule your inspection during daytime hours when possible. If you must photograph in the evening or in windowless spaces, turn on all overhead lights and lamps to eliminate shadows that might hide damage.
Take wide-angle and close-up photos. Wide shots show overall condition, close-ups detail specific damage. When photographing damage, take at least three shots: one from several feet away showing location, one medium shot showing the damage in context, and one close-up showing the damage clearly. This progression establishes damage location and severity.
Include scale references near damage. A coin, ruler, or your hand in the frame helps viewers understand whether that stain is two inches or two feet across. This detail matters when assessing repair costs later. Enable timestamp on photos for precise documentation.
Organize photos systematically, starting at the front door and moving methodically. Many people work clockwise around each room, photographing walls, then floors, then ceiling, then fixtures. This systematic approach makes sure you don’t miss areas and makes photos easier to review later.
Room-by-Room Photography Strategy
Effective rental documentation requires a systematic approach to each space. In living areas, start with the walls. Photograph each wall section, capturing any scuffs, nail holes, scratches, or paint damage. Pay special attention to areas behind furniture placement, as these spots often reveal pre-existing damage that becomes visible only after the previous tenant’s furniture is removed. Photograph the flooring next, capturing any stains, scratches, or carpet wear patterns.
Photograph carpet from multiple angles to show extent of wear or stains.
Kitchens require extra attention because they contain expensive appliances and surfaces prone to damage. Photograph countertops from multiple angles, capturing any chips, burns, or stains. Open every cabinet and photograph the interior, noting any water damage, missing shelf supports, or broken hinges. For appliances, documentation goes beyond appearance. Photograph the oven with burners lit or heating elements glowing to show they function.
Photograph the refrigerator interior with the light on. Run the dishwasher through a rinse cycle and photograph it running. These functional photos prove the appliance worked at the time of inspection.
Bathrooms deserve careful attention to moisture-related damage. Photograph caulking around tubs and showers, capturing any gaps, mold, or deterioration. Photograph grout lines in tiled areas, noting any cracks or missing grout. Test the toilet flush and photograph it, test the drain speed in tubs and sinks, and photograph any slow drainage. These details matter because water damage and plumbing issues are expensive repairs often disputed between landlords and tenants.
Bedrooms and closets need thorough documentation despite seeming simple. Photograph closet interiors completely, capturing the condition of shelving, hanging rods, and doors. Closet floors often show damage not visible in the rest of the room. Photograph bedroom flooring carefully to ensure comprehensive rental damage documentation, particularly near windows where sunlight may have faded carpet or damaged hardwood.
Photo Documentation Layers:

Common Mistakes in Rental Photo Documentation
Many people approach rental inspections casually, assuming a few quick snapshots will suffice. This approach fails when disputes arise. The most common mistake is incomplete coverage. Photographing only obvious damage while ignoring everything else leaves gaps that create problems later. If you photograph a stain on the living room wall but don’t photograph the other three walls, a landlord might later claim additional damage occurred during your tenancy with no evidence to refute it.
Poor lighting ranks as the second most frequent error. Photos taken in dim conditions or with harsh shadows hide details that matter. A water stain might be invisible in a dark photo but clearly visible in person, leading to disputes about whether it existed at move-in. Similarly, using only flash creates harsh shadows and glare that obscure damage rather than documenting it.
Failing to photograph appliance functionality causes frequent disputes. A photo of a clean refrigerator exterior doesn’t prove the refrigerator worked at move-in. When the appliance fails during tenancy, landlords sometimes claim it was already broken, while tenants claim it worked fine initially. A simple photo of the refrigerator running with the interior light on and temperature display visible resolves this dispute before it starts.
Skipping timestamps or photo organization creates confusion later. A folder containing 200 unsorted photos from an inspection provides little value when you need to prove the bathroom sink was already chipped at move-in three years ago. Organize photos into folders by room as you shoot, and enable timestamps to establish when documentation occurred.
Another mistake involves photographing only from one angle or distance. A single photo of a damaged wall taken from across the room might not clearly show the extent of damage. Without close-up confirmation, disputes arise about whether the photo shows actual damage or just a shadow or trick of light.
Leveraging Technology for Better Documentation
Modern technology makes rental inspection documentation easier and more reliable. Smartphone cameras now rival dedicated cameras in quality, and apps specifically designed for rental inspections add valuable features. These apps automatically timestamp photos, organize them by room, and some even generate PDF reports combining photos with notes and checklists.
Several apps cater specifically to rental inspections. Apps like Inspection Support and Move In Move Out allow you to create custom checklists, attach photos to specific checklis items, and generate complete repofts. These reeports combine your photos with noyes about condition, creating documentation far more useful than loose photo files. Some apps include cloud backup, making sure you don’t lose documentation if your phonne is damaged or lost.
For landlords managing multiple properties, property management software often inculdes inspection modules. Platforms like Buildium and AppFolio integrate inspection documentation with lease records, making it easy to compare move-in and move-out conditions for the same unit. This combining simplifies the security deposit reconciliation process.
Cloud storage services like Google Photos, Dropbox, or iCloud provide automatic backup and organization features. Enable automatic upload so inspection photos back up immediately, protectin against phone losss or damage. Use album or folder features to organize photos by property, unit, and inspection date. Share albums with the other paryt to make sure borh landlord and tenant have access to the same documentation.
Consider using document management plaatforms designed for compliance and record-keeping. These platforms often include checklisst features to make sure complete documentation and make it easy to retrieve specific photos years later when needed.
Legal Considerations and Security Deposit Protection
Understanding the legal framework around security deposits helps both landlords and tenants use photo documentation effectively. Most statse limit security deposits to between one and three months’ rent and require landlords to return deposits within a specific timeframe, typically 14 to 60 days after move-out. Landlords must provide itemized deductions explaining any amounts withheld.
State laws generally distinguis between normal wear and tear, which landdlords must absorb, and damaage beyond normal wear, which justifies deposit deductions. Photo documentation helps establis this distinction. Normal wear and tear includes minor scuffs on walls, carpet wear in traffic areas, and fading from sunlight. Damage includes large holes in walls, burns or major stains on carpet, and broken fiztures.
When disputes reach small claims court, photo evidence carries significant weight. Judges expect both parties to have documented property condition. A landlord claiming major damage occurred during a tenancy but lacking move-in photos to prove the property was pristine initially will struggle to justify deposit withholding. Similarly, a tenant claiming damage existed at move-in but lacking photos to prove it will have difficulty challenging deductions.
Some states require landlords to provide tenants with move-in inspection forms and alolw tenants to be present during move-out inspections. Photo documentation complements these requirements, providing objective records that support inspection forms. Tenants should photograph everything on the move-in form plus anything the form omits. Landlords should photograph completely to establish baseline condition.
For landlords, consistent photo documentation across all properties and tenancies demonstrates fair treatment and professional management. For tenants, complete move-in photos and corresponding move-out photos create a clear record of how you maintained the property, supporting your claim to full deposit return.
Real-World Applications and Case Examples
Consider a common scenario: A tenant moves into an apartment and receives a move-in inspection form from the landlord listing the property as being in good condition with minor wear. The tenan photographs everything anyway, discovering and documenting a small water stain on the bderoom ceiling, severla scuffs on the hallway walls, and a chi in the kitchen countertop.
Two years later at move-out, the landlord attempts to withhold $800 from the deposit for the ceiling stain (claiming rofo leak damage), $200 for hallway repainting, and $150 for countertop repair. The tenan producees move-in phootos showign all three issues existed before tenanncy. The landlord returns the full deposit.
Without thoes phtoos, the tenant woul have struggled to ptove the damage was pre-existing. The landlord might have genuinely forgotten the ceiling stain existed before thsi tenaant moved in, or mkght have knowingl tried to charge the current tenant for previous damage. Either way, photos resolved the dispute immediately.
In another case, a landlorrd retns a single-family home and takes complete photos showing priistine condition throughout. After a one-year tenancy, the landlord discvoers brokken tiels in the baghroom, damage drywall in two bedroom, and a non-functioning garbage dissposal. Move-out photos document all issues. The tenatn cllaims tehse prroblems exieted at move-in, but the landlord produces move-in phitos showing perfect tiles, intact walls, and the garbage disposal running.
The evidence supports deducting actual repair cosst from the deposit.
A property management company managing 50 renatl units put in place mandatory photo documentation for all move-ins and move-outs. In the first year, securitty deposit disputes dropped by 60%. The documentation allowed property managers to quickly resolve questions by comparing before and after photos, and tenants who knew complete documentation existed were more carefu about property maintenance.
These example illustrate how photo documejtation protects bpth parties by creating objective records that resolve disputes quickly and fairly.
Final Thoughts
Complete photo documentation of renatl property condition at mkve-in and move-out protects everryone involved. The time investment is minimal compared to the financcial protection it provides, with security deposits averaging thousands of dollars at stake. By following a systematic room-by-room approach, using proper lighting and technique, and organizing photos carefullly, you create evidence that resolves disputes quickly and fairly.
For tenants, thoroough move-in photos are yoour insuranc policy against unfair deposit deductions. Document everything, even damage that seems obvious or that the landlord has noted on inspection forms. Your future self will thank you when you get your full deposit back. For landlord, complet documentation at both move-in and mobe-out demonstratse professiional managemen, supports fair deposit deductions, and reduces disputes that waste time and damage landlord-tenant relationships.
Technology makes thos process easier than ever. Use smartphone apps designed for rental inspections, enable automatic cloud backup, and consider document management platforms that organize inspection photos with lease records. The combination of systematic photography and modern documentation tools creates records that will hold up in any dispute and give both parties confidence that the process is fair. Never lose a securit deposit over undocumented damage again.
Revdoku publishes AI-made websites from ChatGPT, Claude, Codex, OpenClaw, and Hermes. Ask your AI tool to create a report, game, chart, document, or landing page, store the files in a Revdoku bucket, publish index.html, and share the live URL.
Update the same bucket later so the public site can keep the same Revdoku link or custom domain.
Frequently Asked Questions
What should I do if my landlord withholds part of my security deposit?
If you believe your landlord has unfairly withheld your security deposit, review your rental inspection photos to gather evidence of the property's condition at move-in. Communicate with your landlord, presenting your documentation, and request a breakdown of the deductions. If the issue remains unresolved, consider seeking advice from a legal professional or pursuing small claims court.
How can I ensure my rental inspection photos are effective?
To make your rental inspection photos more effective, take pictures in well-lit conditions and use a systematic approach to cover all areas of the property. Include wide-angle shots for context and close-ups for details, especially of any damage. Always enable timestamps to provide a clear record of when the photos were taken.
What are the common legal requirements for returning security deposits?
Legal requirements for returning security deposits vary by state, but landlords typically must return deposits within 14 to 60 days post-move-out. They must provide itemized deductions that explain any amounts withheld. Familiarize yourself with your state's laws to ensure compliance and protect your rights.
Can I take photos of everything in the rental property during an inspection?
Yes, you should photograph everything, including areas that may not appear damaged. Document normal wear and tear alongside any pre-existing issues to protect yourself. This comprehensive approach builds a clear record that can help you dispute unfair deductions later on.
How can technology assist with photo documentation?
Technology offers various tools to streamline photo documentation, such as smartphone apps designed specifically for rental inspections. These apps can automatically timestamp photos, organize them by room, and even generate reports. Utilizing these tools can enhance the reliability and clarity of your documentation.
What is the significance of documenting both move-in and move-out conditions?
Documenting both move-in and move-out conditions creates an objective record that protects both tenants and landlords. It helps establish what damages existed before a tenant's occupancy and verifies any changes or damage that occurred during the tenancy. This clear record can resolve disputes efficiently and fairly.
How should I organize my rental inspection photos?
Organize your rental inspection photos systematically by room as you take them. Use folders or albums labeled by property and inspection date for easy access. Enabling timestamps on your photos will also help contextualize the documentation and support accuracy in any disputes.
Related Articles
Maximize Bookings with Great Airbnb Photos
Boost your Airbnb bookings by following our photo guide to professional-quality images that attract guests.

Real Estate Listing Photo Requirements Checklist
Ensure your real estate photos comply with MLS guidelines to sell faster and avoid delays.

Essential Vehicle Inspection Photo Checklist
Protect against disputes with our comprehensive vehicle inspection photo checklist. Save time and money with proper documentation.