Maximize Bookings with Great Airbnb Photos
Airbnb listing photo checklist
Use this list before a photo shoot and again before you upload the photos. It covers the photo guidance from Airbnb, a shot list for each room, and the quality items that guests notice.
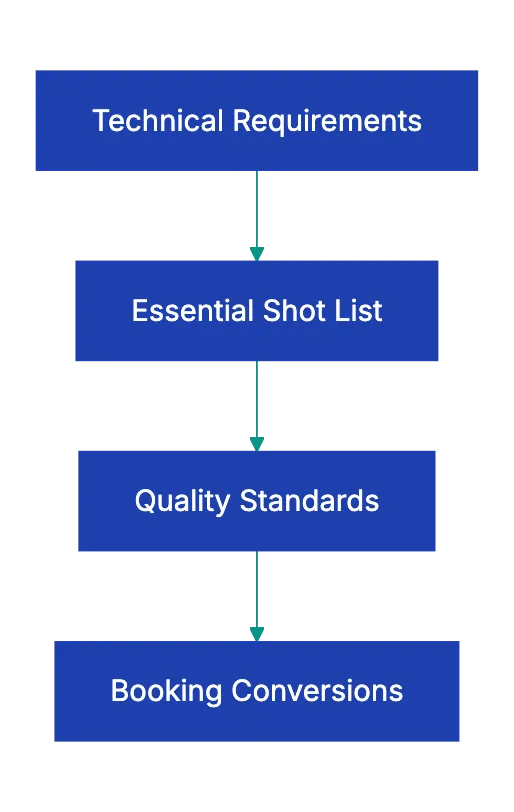
Technical requirements
| Item | What Airbnb asks for |
|---|---|
| Resolution | At least 1024 x 683 pixels, from the Airbnb Help Center. The Airbnb hosting guide suggests 1200 x 800 pixels or larger, with files up to about 10 MB. |
| Orientation | Horizontal. Search results cut photos to squares. Keep the main subject near the center. |
| Number of photos | At least 5 to get started. In practice, one or more photos of each room and of each feature that you advertise. |
| Photo tour | The photo tour is the part of the listing that groups photos by room. Airbnb sorts your photos into rooms. A room needs at least one photo to appear in the photo tour. |
| Cover | The first five photos appear on the cover page of the listing. |
| Accuracy | The photos must show the space accurately. The accuracy section below gives the rules. |
Shot list

Photograph these areas, in this order:
- Exterior and entrance: the building, the front door, and the path that guests use to get in.
- Living room: a wide shot from a corner that shows the layout and the seats.
- Kitchen: counters, appliances, and storage. Guests want to know if they can cook a full meal.
- Each bedroom: the bed, the window, and the closet or the storage. Groups count the beds carefully.
- Each bathroom: the toilet, the sink, and the shower or the tub in one photo if possible. For a small bathroom, shoot from the doorway.
- Dining area: the place where the guests eat together.
- Workspace: if you list one, show the desk and the chair.
- Outdoor space: the patio, the balcony, the yard, or the pool, with the furniture in place.
- Special features: a hot tub, a fireplace, a game room, or a view. Give each feature its own photo.
- Location: the street, the beach, the view from the window, or a landmark near the property.
Show how guests get in, but keep security details out of the photos. Do not show lockbox codes, keypad codes, or alarm panels.
Before you shoot
Prepare each room:
- Clean each room. Clear the counters, the sinks, and the tables.
- Make the beds with plain, neutral sheets. Fold the towels.
- Remove personal items: family photos, toiletries, mail, chargers, and cables.
- Take pets and people out of the room.
- Remove seasonal decorations. In a few months, they will look wrong.
- Open the blinds and the curtains.
While you shoot
Use these settings and habits:
- Hold the camera horizontally. Turn on the camera grid to keep the lines straight.
- Use natural light and turn off the flash.
- If a room is still too dark, turn on the indoor lights. The Airbnb guide gives this order.
- Photograph each room at the time of day when it gets the most daylight.
- For outdoor photos, use the golden hours (the 60 minutes after sunrise and before sunset). Airbnb recommends this time.
- Use a wide angle to show the layout. Do not make a small room look larger than it is.
- Look for your reflection in mirrors, windows, and TV screens.
- Take a mix of wide, middle-distance, and close-up shots.
Before you upload
Make sure that:
- Each photo is horizontal and sharp.
- The light and the colors are the same from photo to photo. White surfaces look white, not yellow or blue.
- No photo shows clutter, personal items, cords, pets, or people.
- No mirror or window shows your reflection.
- Each bedroom and each bathroom has at least one photo.
- Each amenity in your description appears in a photo.
- The photos show the property as it is today.
- The first five photos are your best photos, and they include the main living space.
- The captions give facts that the photos cannot show. Airbnb gives this example: “The dining table expands to seat 10 people.”
Ask a person who never visited the property to look through the photos. That person sees clutter that you no longer notice.
Put your best photos first
The first five photos appear on the cover page. Put your best photos there. Usually these are the main living space, the best bedroom, the kitchen, and the feature that makes your place different. That feature can be the view, the hot tub, or the garden. Put closets, laundry, and storage later in the photo tour. You can change the order of the photos in the photo tour.
Accuracy: what Airbnb does not allow
Airbnb’s ground rules for hosts require photos and descriptions that accurately represent the space. Airbnb tells hosts to remove content that AI or other digital tools changed to hide flaws or damage. The same rule applies to edits that add amenities that are not there. For repeated or severe violations, Airbnb can suspend or remove the host or the listing.
Follow these rules for each photo:
- Photograph your own unit. Do not use a photo of a similar unit or a stock image.
- Edit the brightness, the contrast, and the angle of the photo. Do not edit the room itself.
- If you renovate, add new furniture, or see visible wear, take new photos. Guests compare the place with the photos, and reviews show the difference.
- Do not use a wide angle to make small rooms look large. Guests who feel misled write about it in reviews.
A photographer or your own phone
A phone camera can take good listing photos if you follow the list above. Airbnb says the same thing in its guide. A photographer brings lights, a wide lens, and a fresh view of the space. In a market with many similar listings, these photos can help your listing stand out.
Airbnb also offers professional photography in many cities. You ask for a quote by email. The photographer takes two to three images for each room. Airbnb takes the cost from your next payout. Each listing gets only one shoot, and Airbnb gives no refund after the shoot starts. Finish all changes to the space before you book it.
Use this checklist with Claude or ChatGPT
Claude and ChatGPT can look at photos. Upload your listing photos in small groups with this checklist, and ask for a review of each room:
- Paste the shot list and the “Before you upload” list into the chat.
- Upload the photos in the order that you plan to use.
- If you do not want to upload photos, write one line that describes each photo.
- Ask which shots are missing and which photos fail an item.
Here is my Airbnb photo checklist and the photos for my 2-bedroom apartment
listing, in the order I plan to use them. Go through the checklist item by item.
For each photo, say which items it fails (clutter, personal items, dark,
crooked, reflection, vertical). Then list the shots from the shot list I am
still missing, and suggest the five strongest photos for the cover page.
Remove private details before you upload the photos. Crop out mail with your address, door or lockbox codes, documents, and faces. The model can miss small details, for example a cable behind a sofa or a reflection in a window. It also cannot measure the pixel size of an upload reliably. Read the resolution in the file information on your phone or computer.
A docs portal with Ask AI
and support tickets
Connect a repository, or describe your product to start. Each docs site has search, Ask AI, an API console, an MCP server and support tickets.
- Publishes from GitHub on every push
- Works with Mintlify repositories
- API console from your OpenAPI file
- MCP server and llms.txt for AI agents
- Ask AI and support tickets
- Analytics for people and AI agents
Related Articles
Real Estate Listing Photo Requirements Checklist
Real estate listing photo checklist: MLS file rules, branding, people, photo rights, virtual staging disclosure, room coverage and photo order.
Essential Rental Inspection Photo Checklist
A room-by-room rental inspection photo checklist for move-in and move-out, how to take the photos, and two examples of deposit rules.

Essential Vehicle Inspection Photo Checklist
A full shot list for vehicle condition photos at rental pickup and return, used car purchases and fleet handoffs, plus storage tips.