Add Revdoku to Claude Web or Claude Desktop
These steps add your Revdoku account to Claude as a custom connector, in a browser or in the Claude desktop app. The steps are the same in both. With the connector, Claude can list your docs sites, read support tickets and publish a site. You need a Revdoku account and a Claude account. To find out which Claude plans can add a custom connector, read Claude plans that can add connectors.
To add only a docs site, which needs no sign-in, go to Add a docs site instead.
-
Create a Revdoku account. Sign up with Google, GitHub or your email address.
-
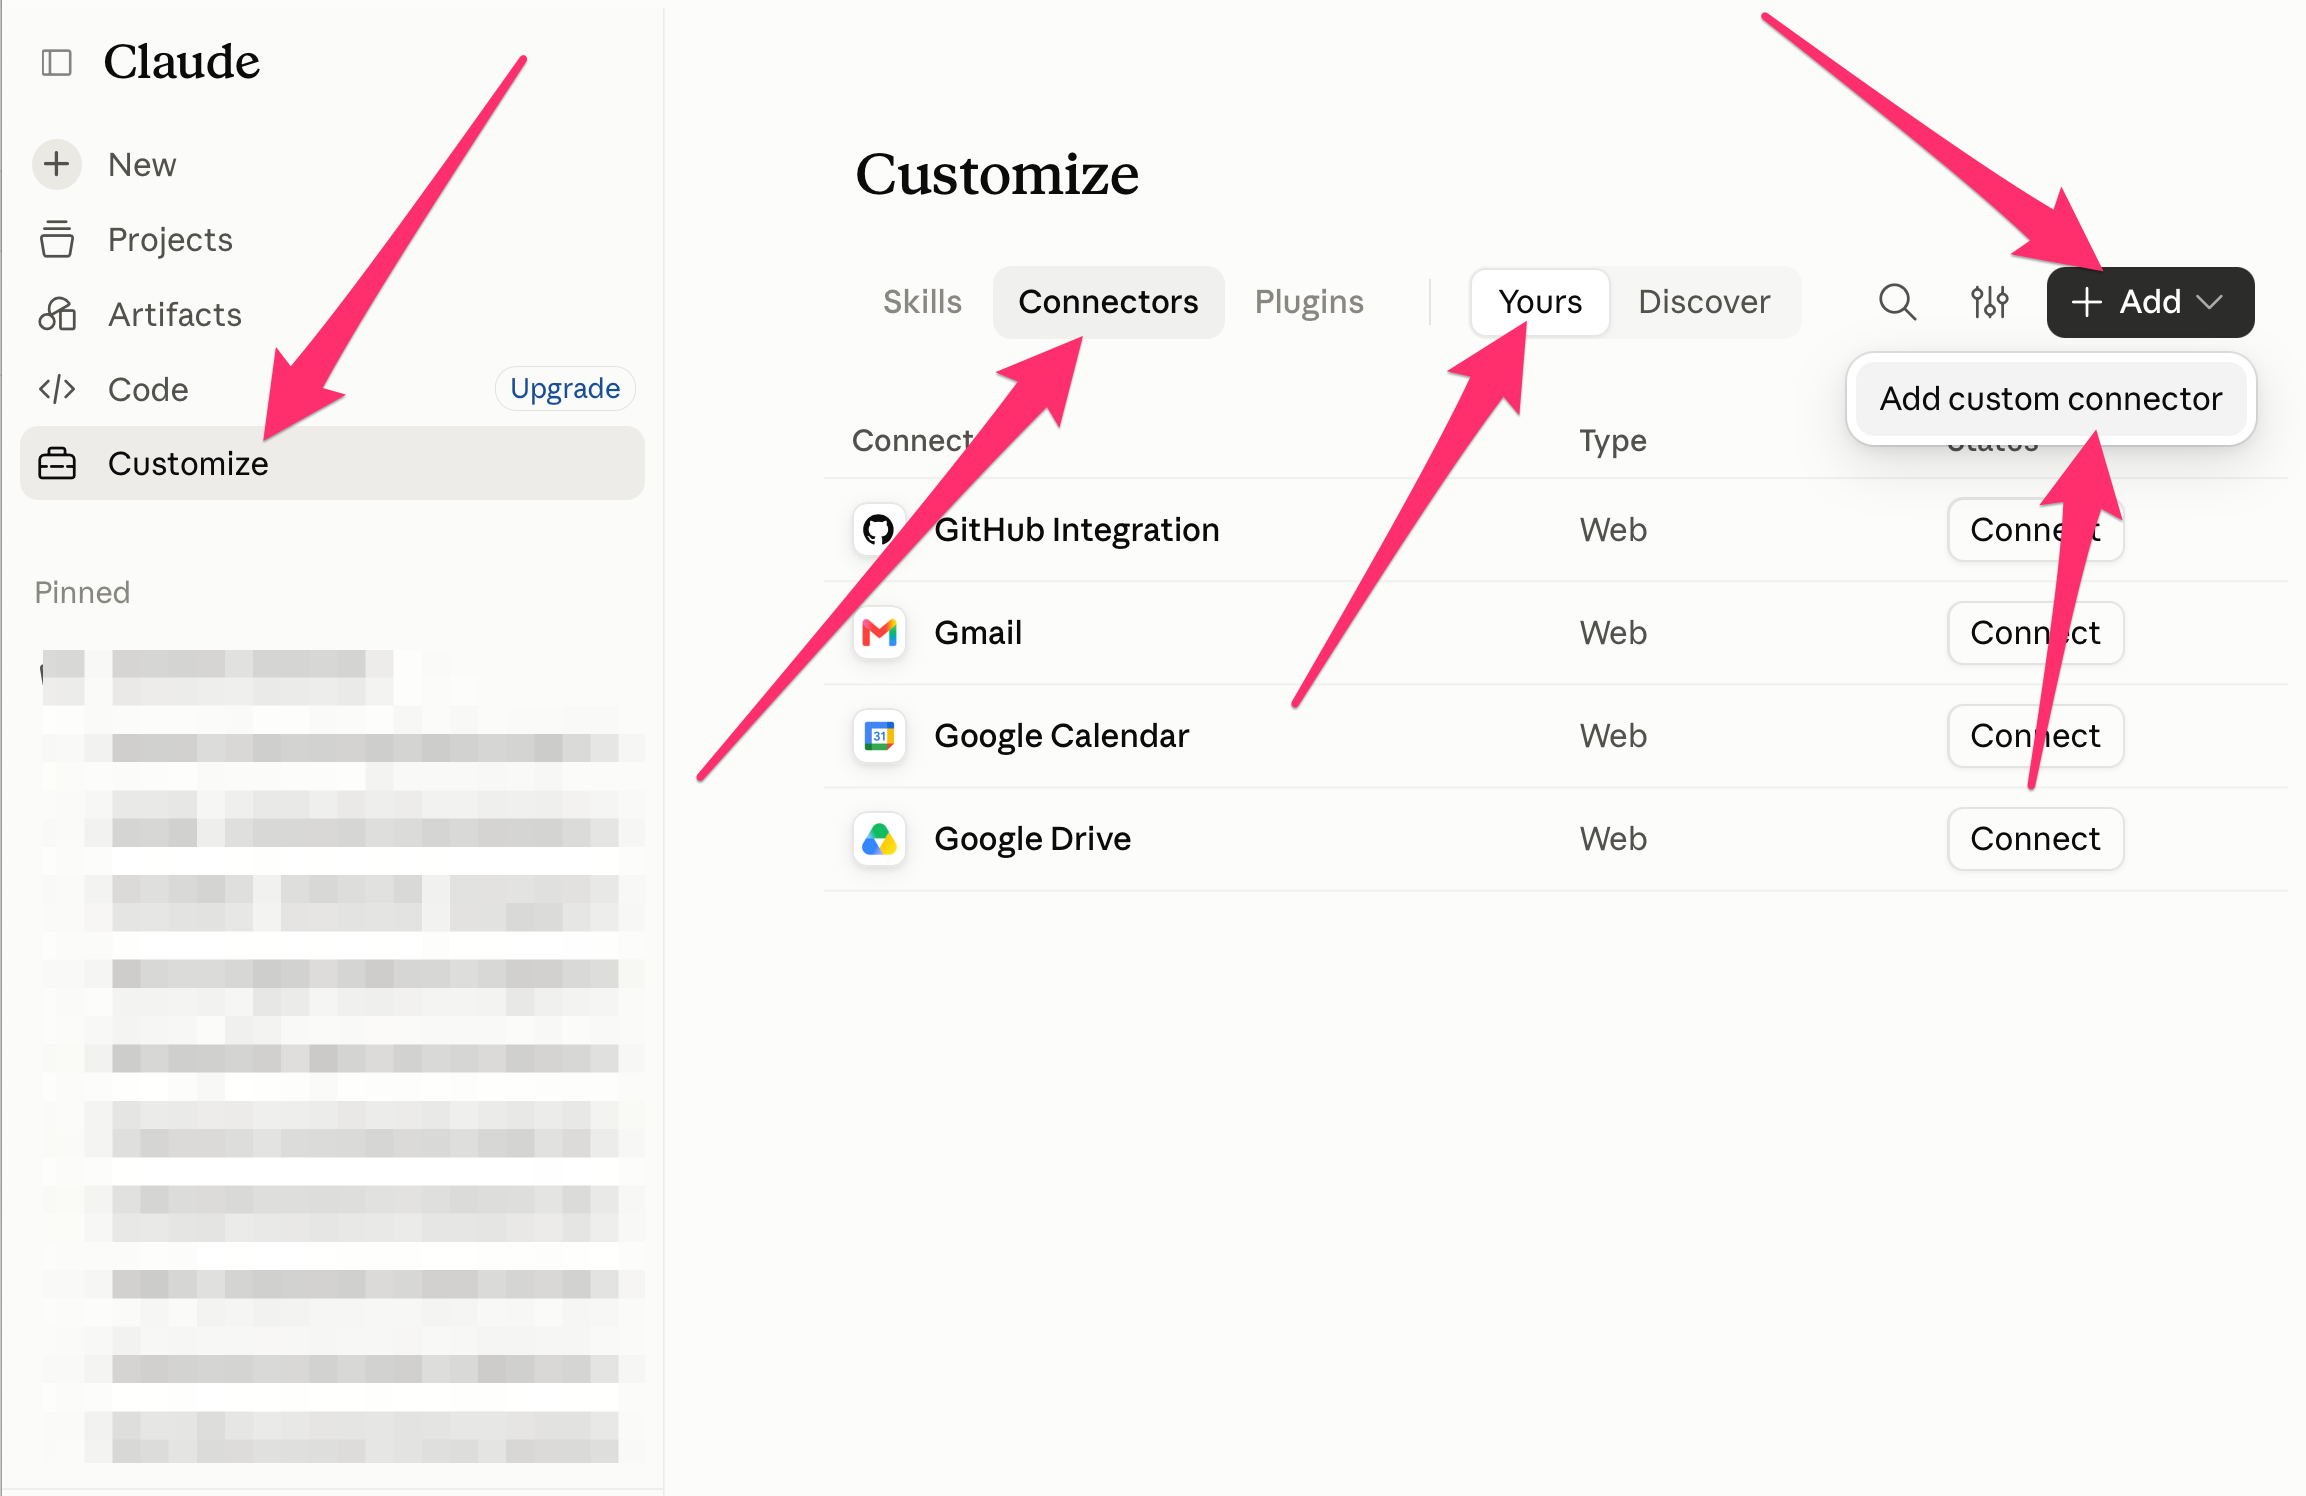
In Claude, open Customize → Connectors → Yours. Click + Add → Add custom connector.
-
Type
Revdokuas the name andhttps://mcp.revdoku.comas the URL. Click Continue.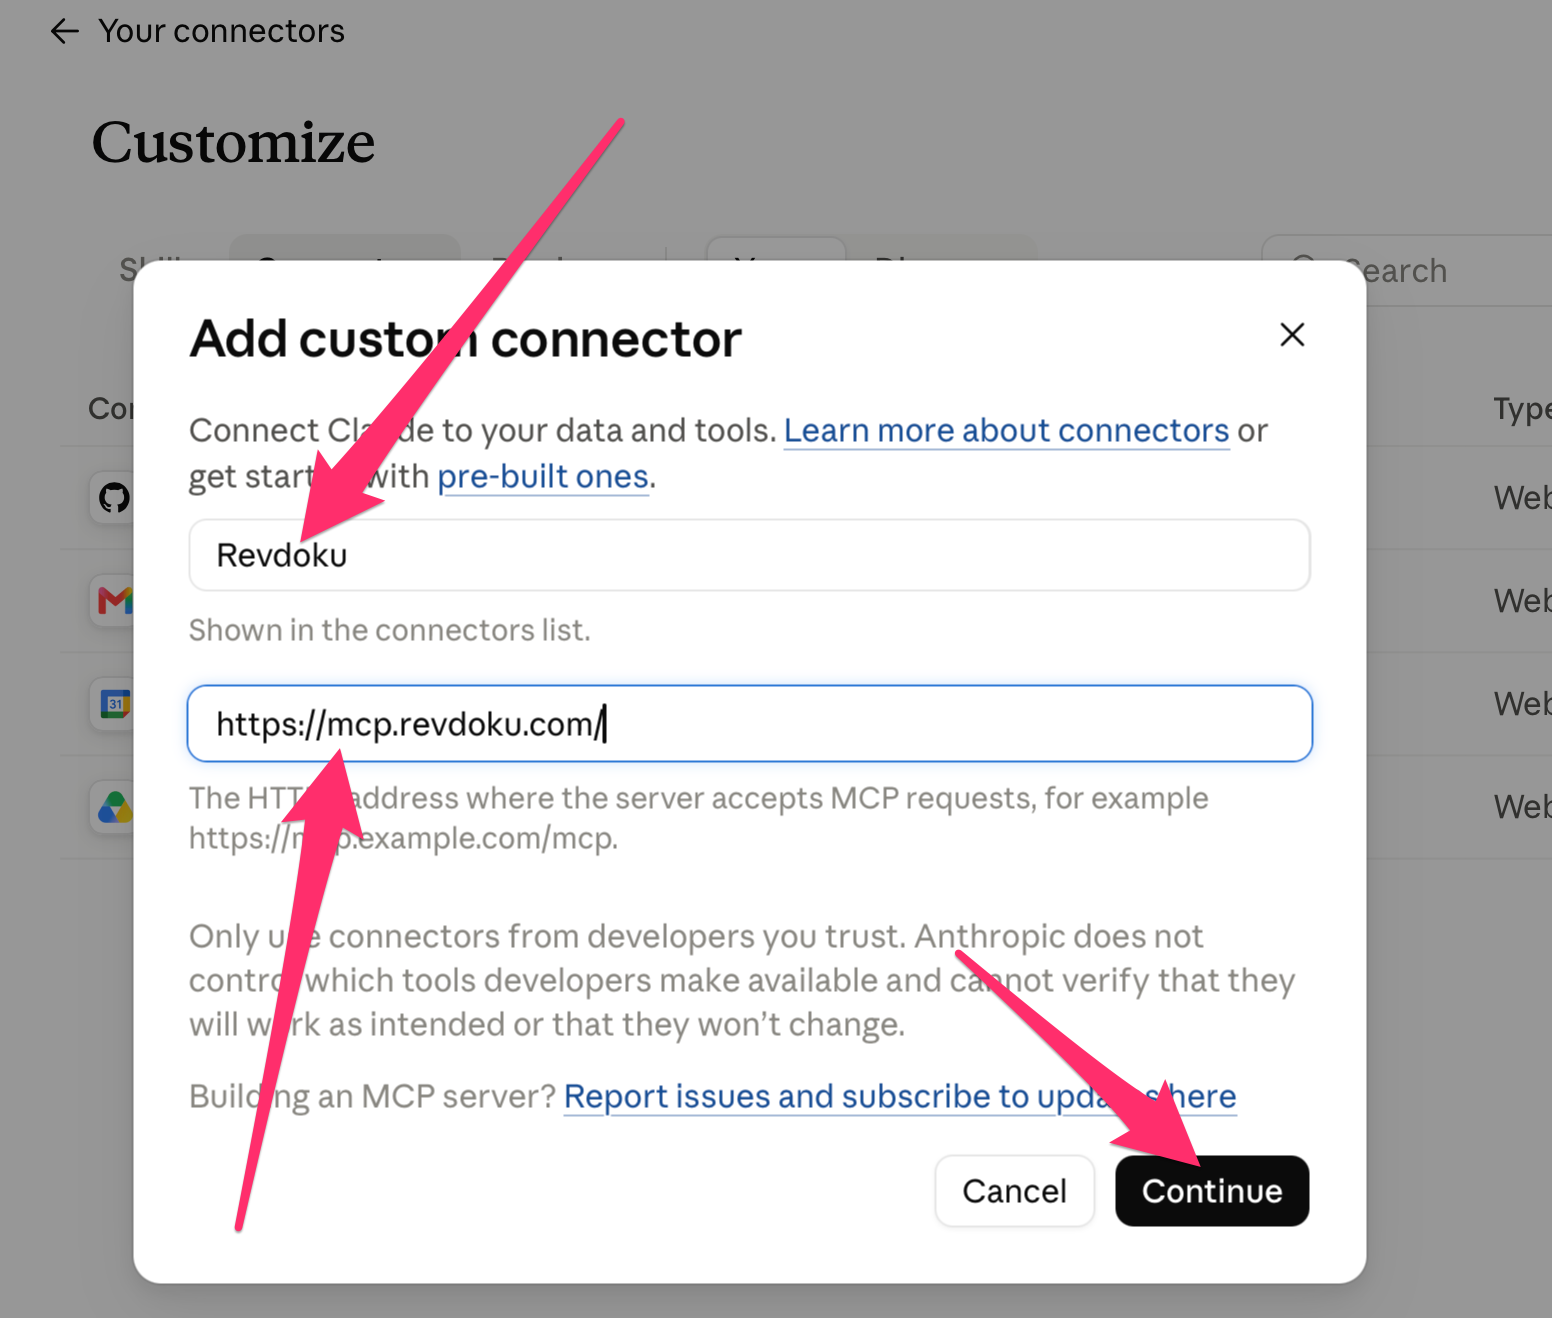
-
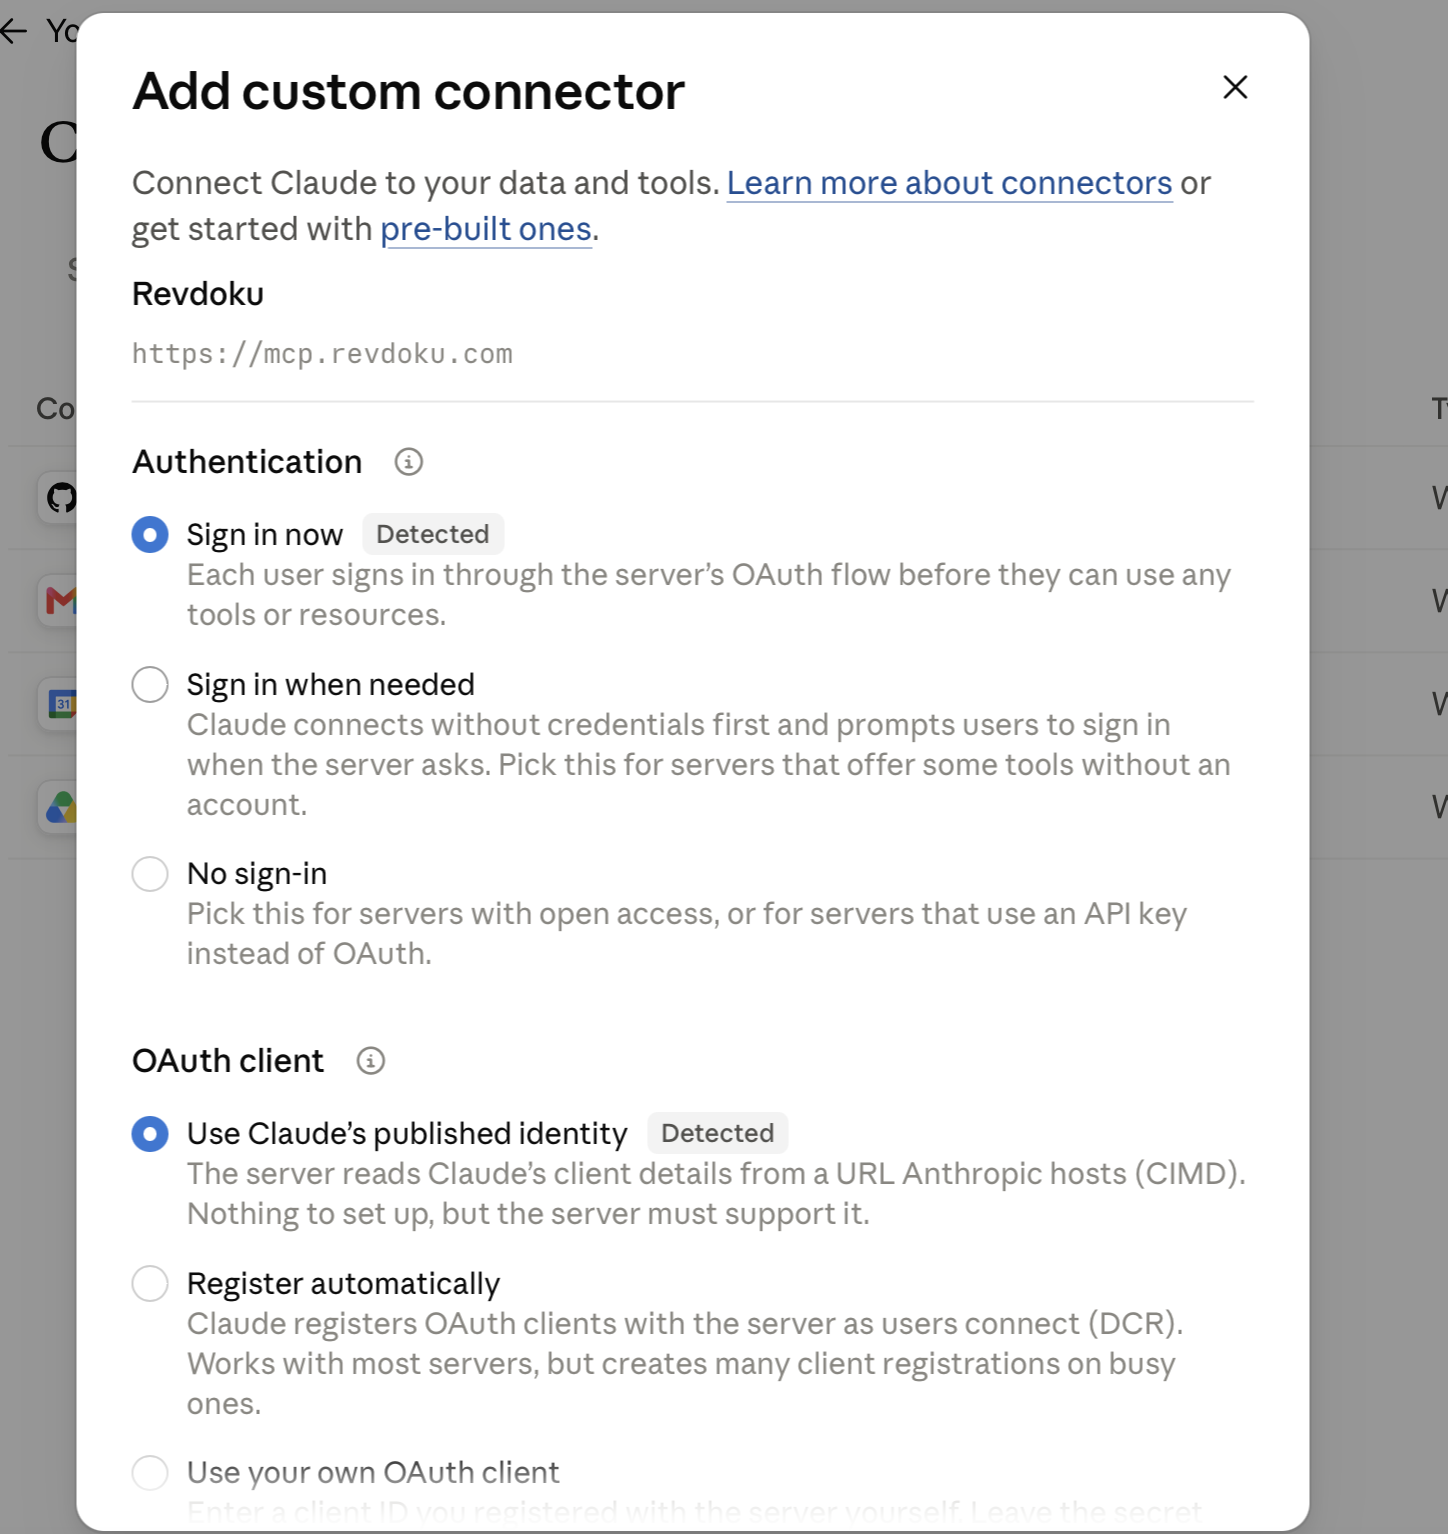
Under Authentication, make sure that Sign in now is selected. Under OAuth client, make sure that Use Claude’s published identity is selected.
Claude marks both values as Detected for Revdoku. If Claude selects No sign-in, change it to Sign in now. Register automatically also works. Leave the client ID and secret fields empty.
-
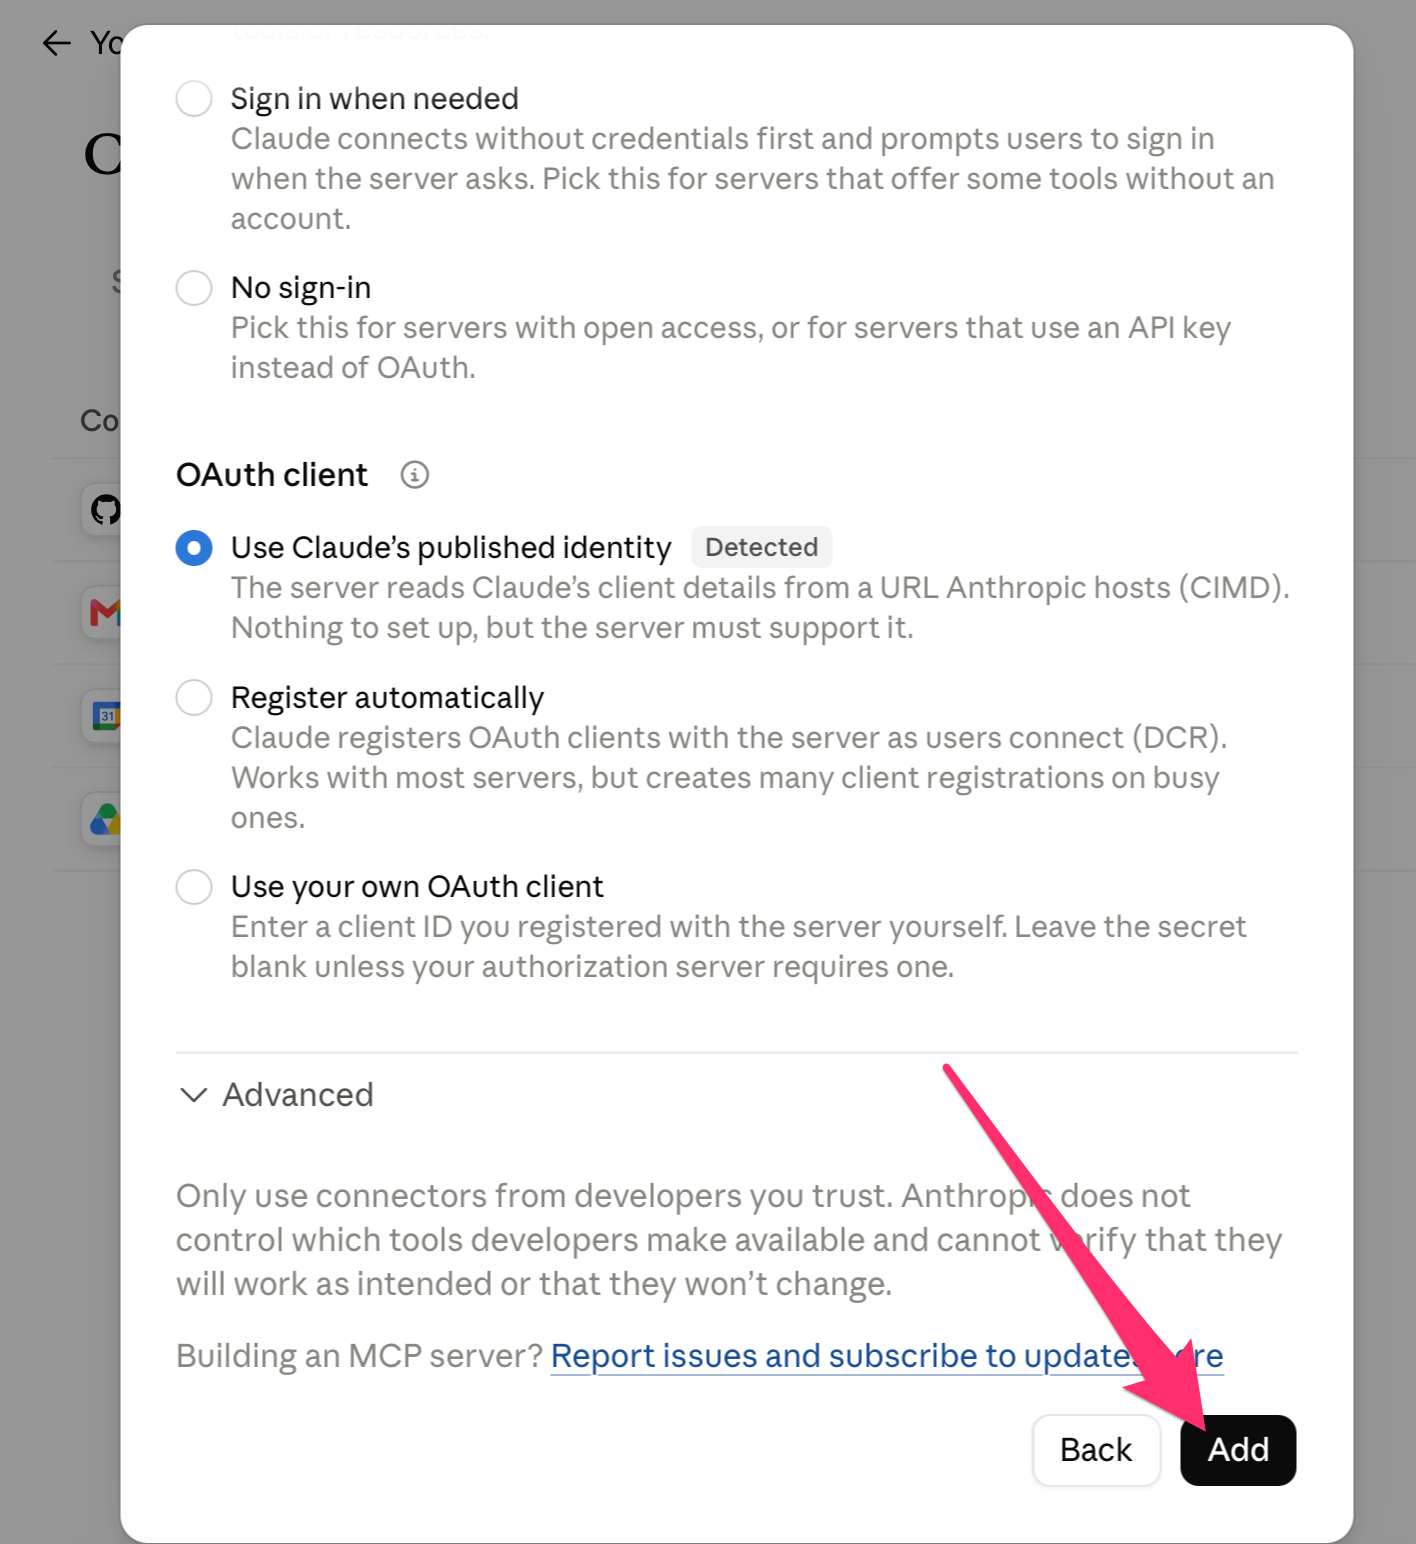
Scroll down and click Add.
-
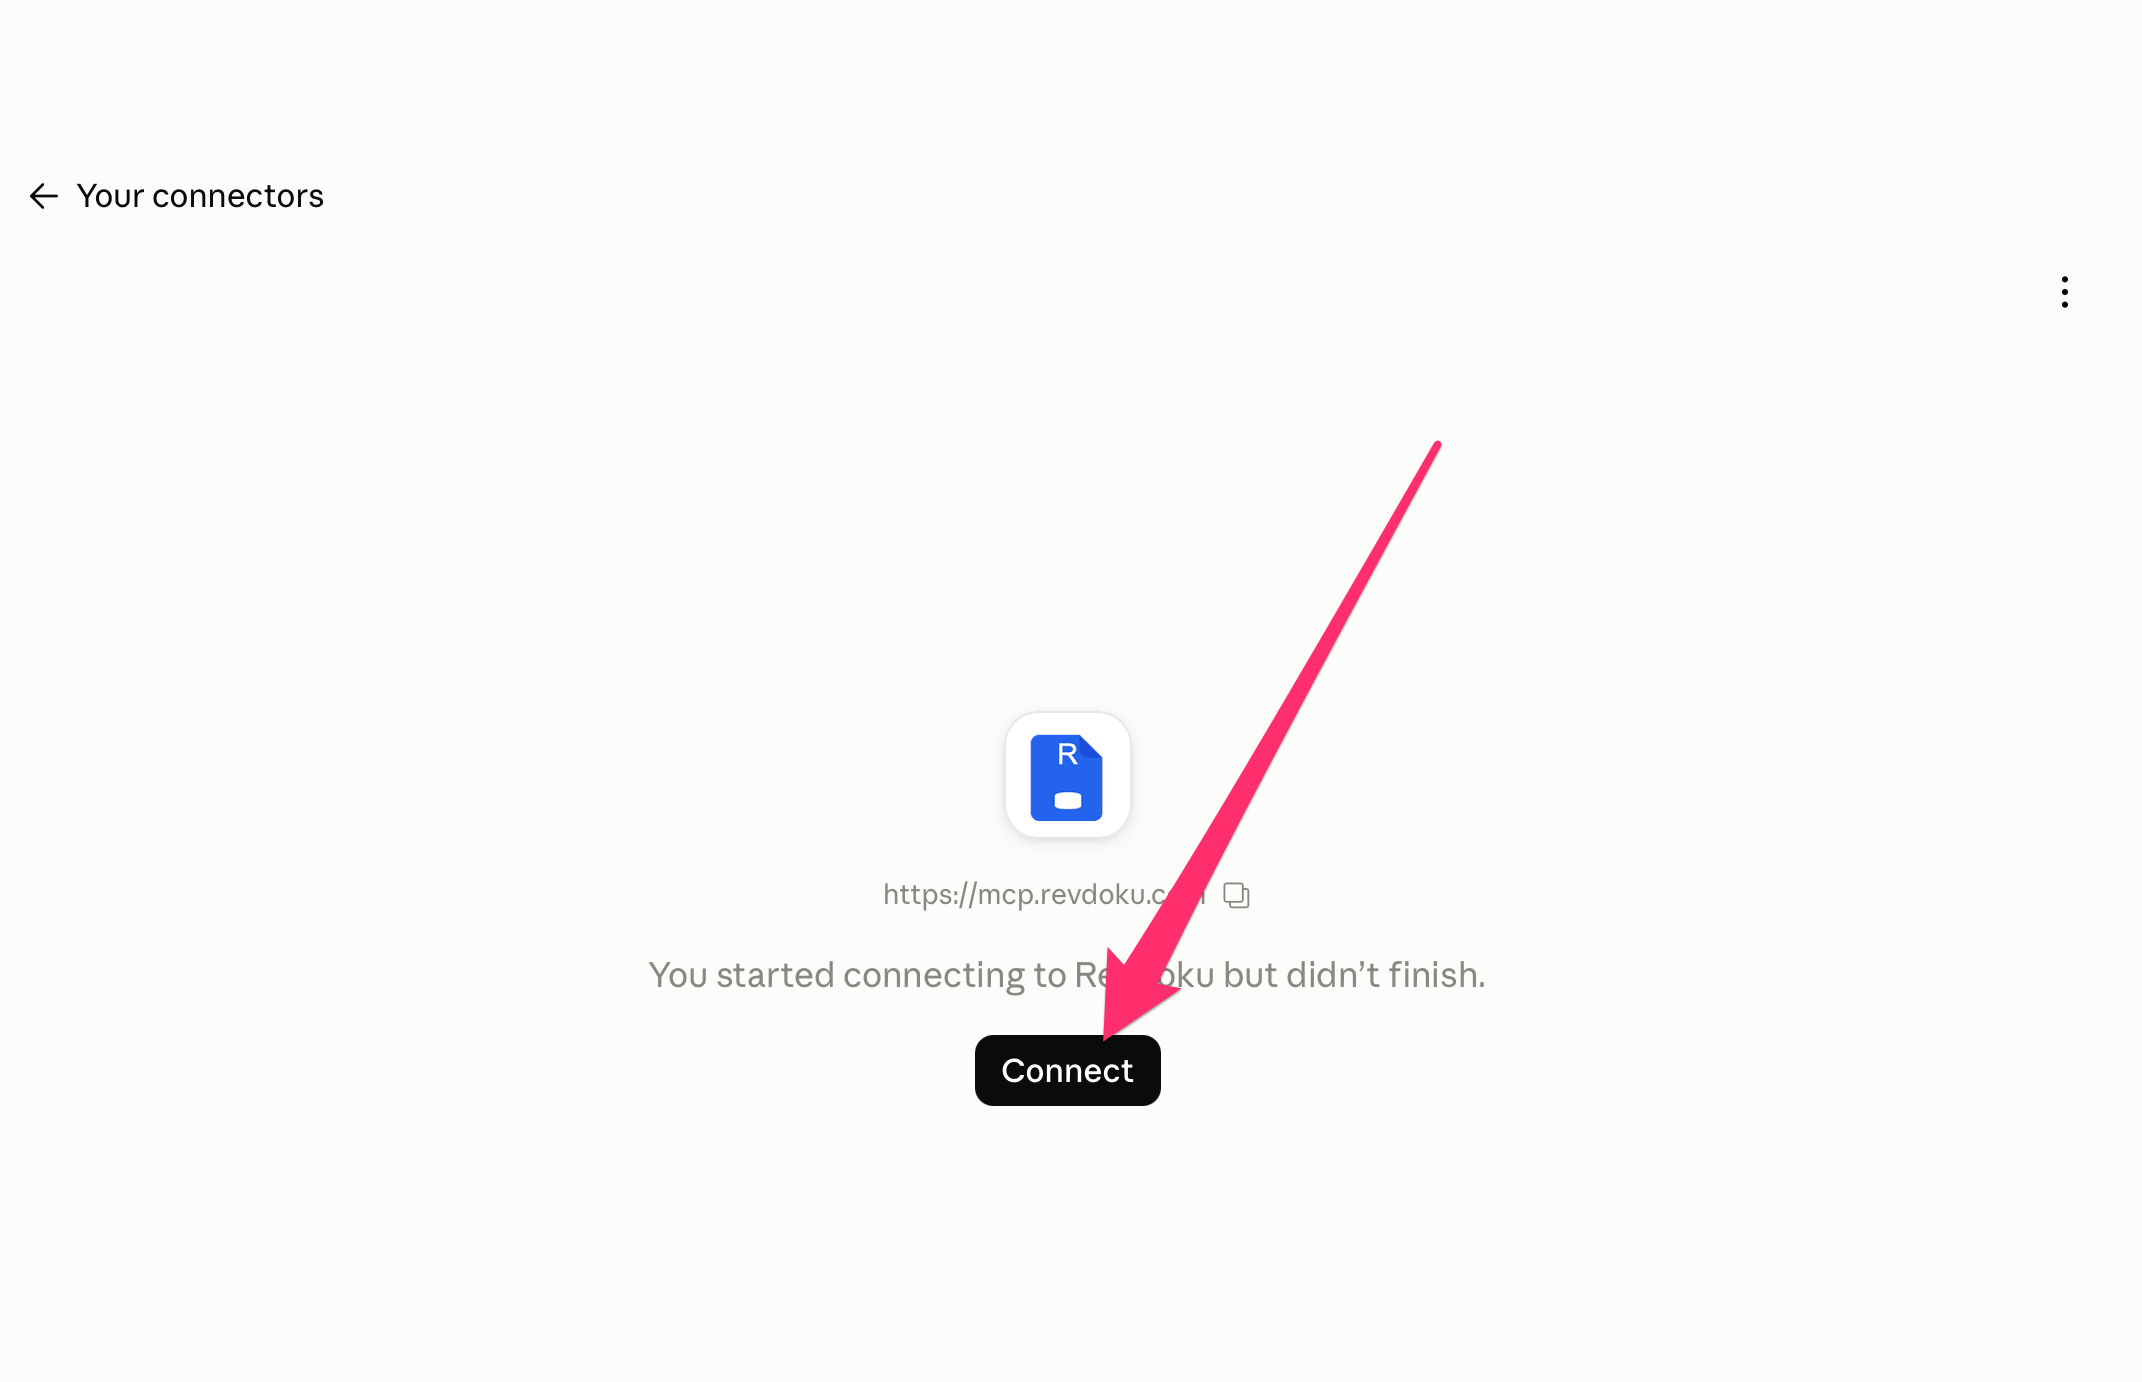
If Claude shows a Connect button, click it.
-
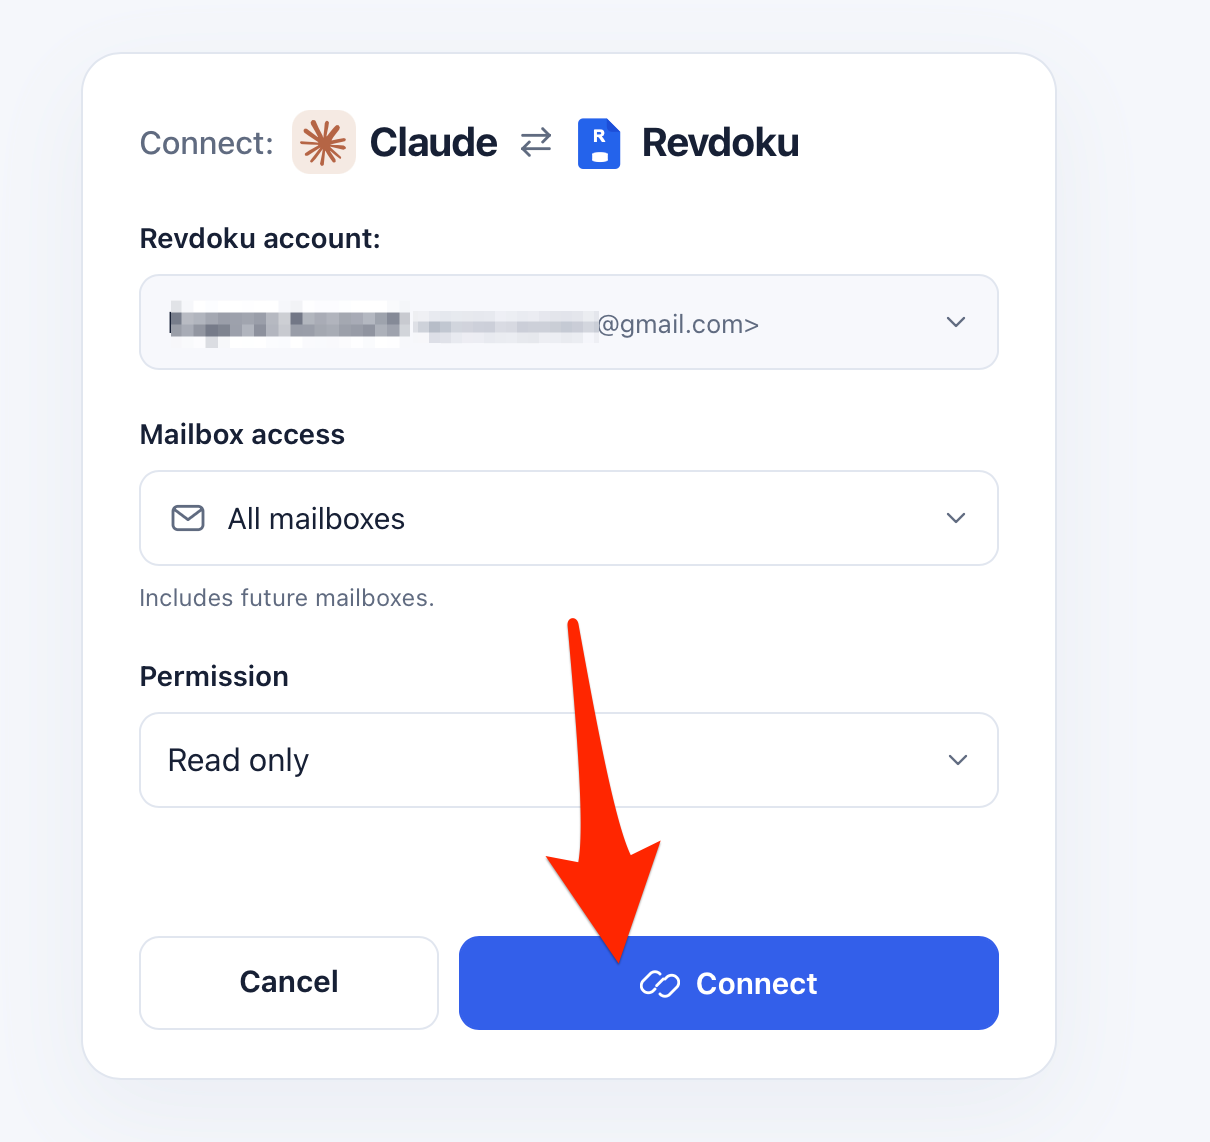
If Revdoku asks, sign in. Select your Revdoku account and the buckets that Claude can use. Under Permission, select an access level. Click Connect.
A bucket holds the files of one docs site, the site and its support tickets. All buckets also includes the buckets that you create later. With Read & write, Claude can reply to support tickets. With Full access, Claude can also publish and unpublish docs sites. The access levels explain each choice. The screenshot shows an earlier version of this screen. There, Bucket access had the name Mailbox access.
-
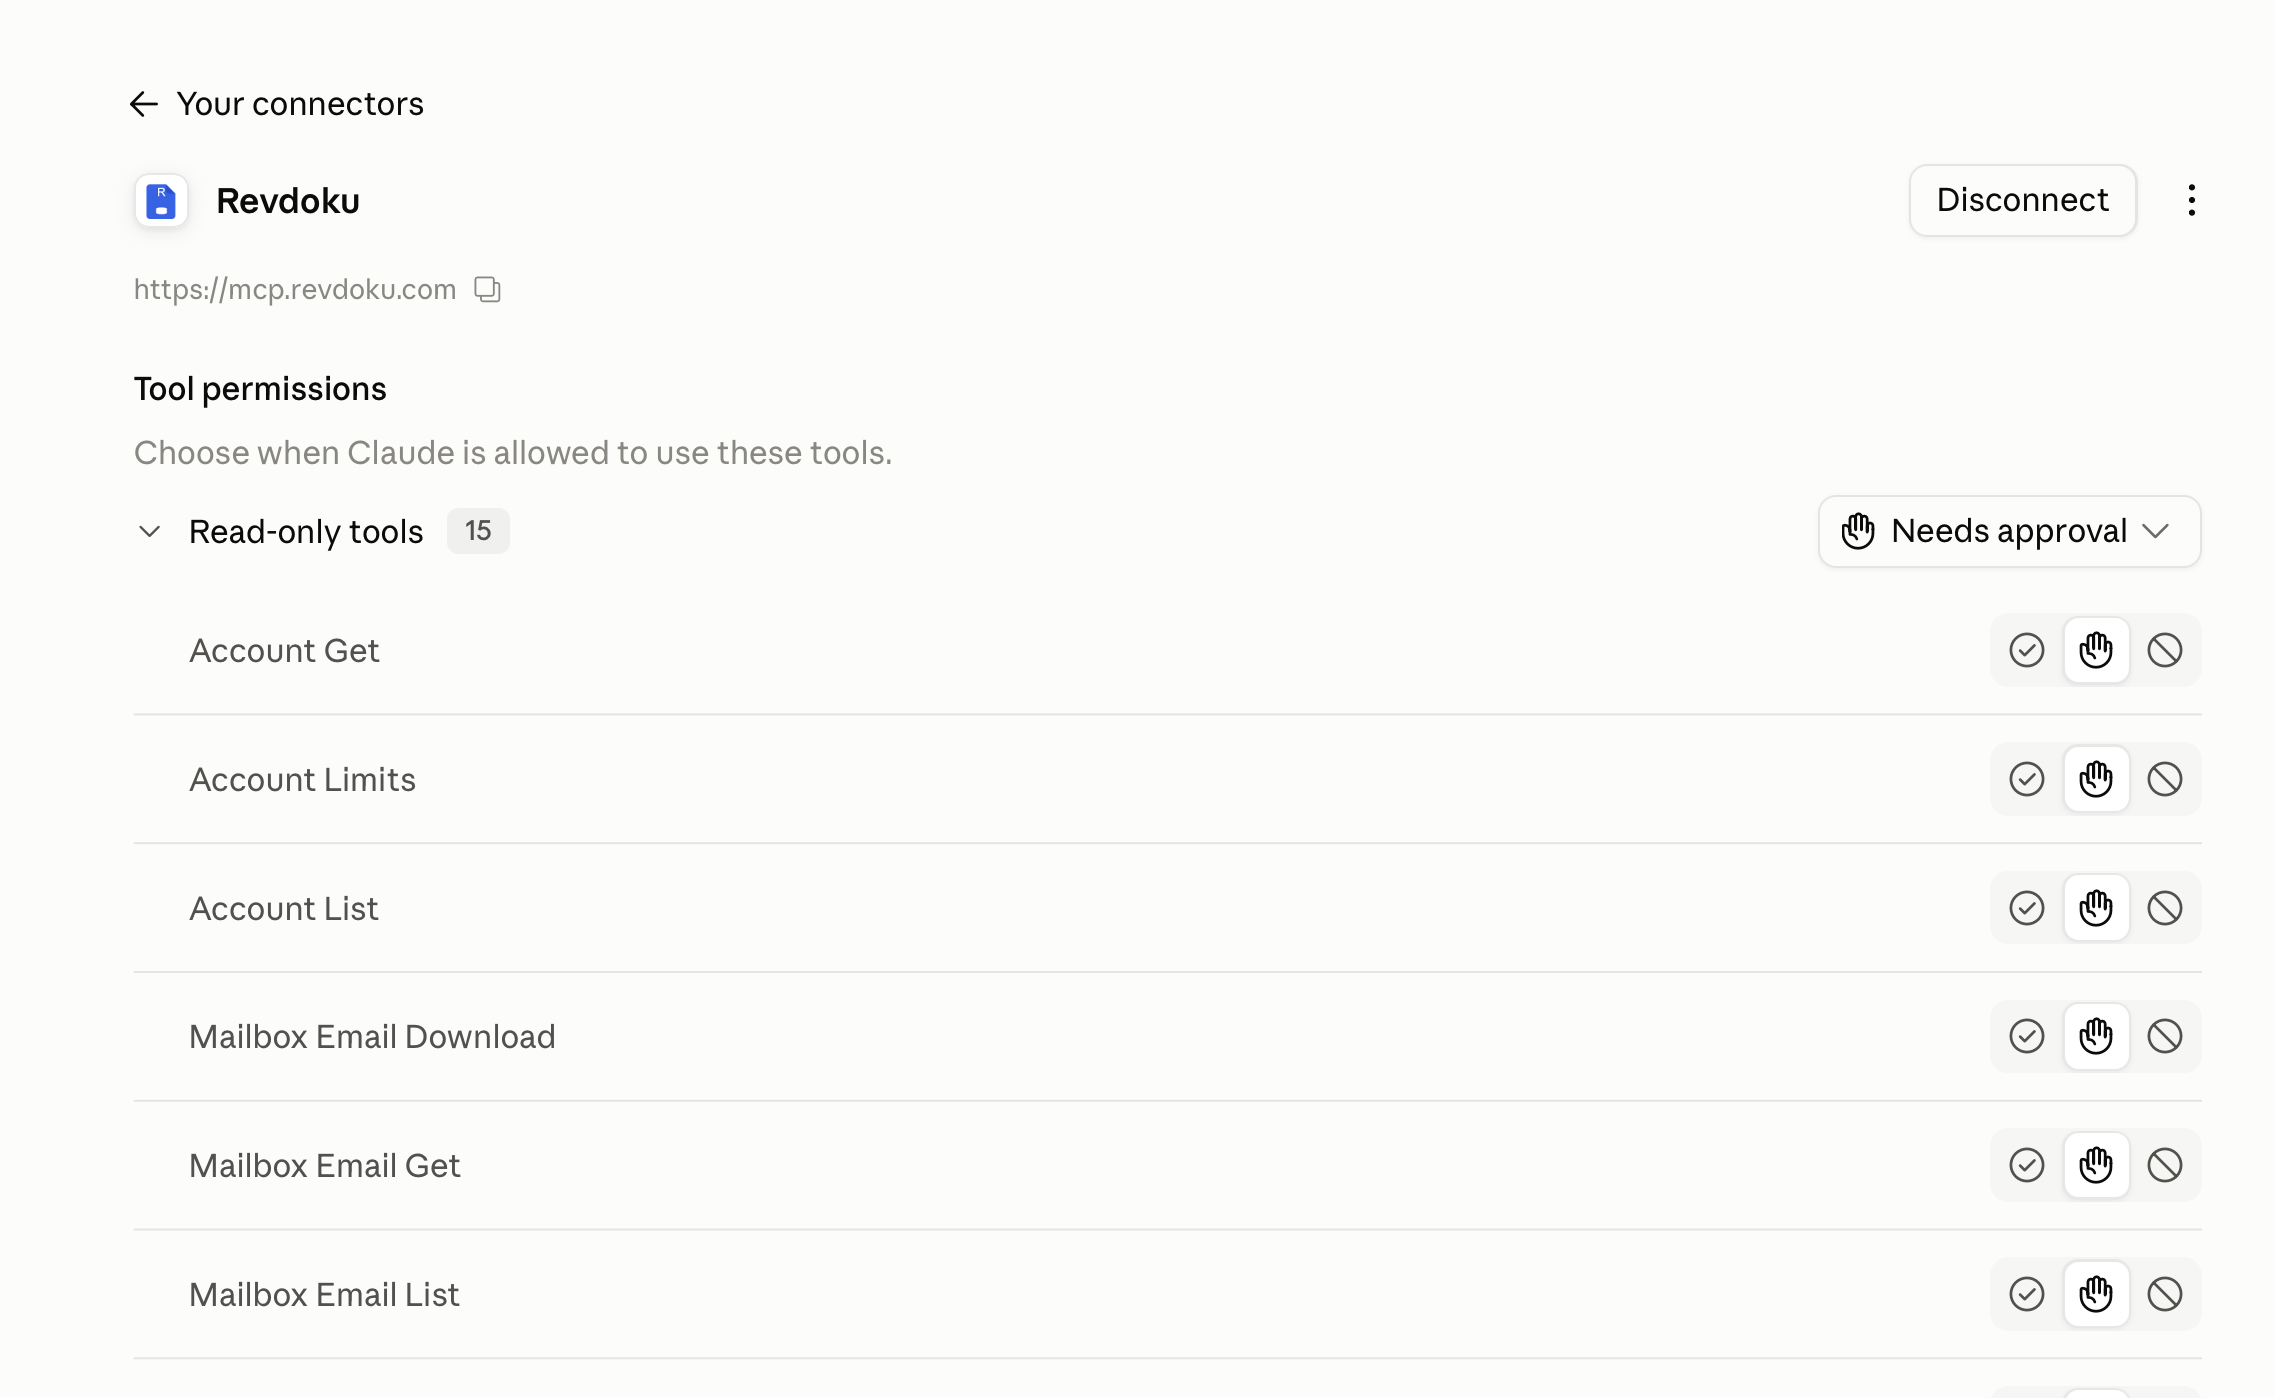
Back in Claude, make sure that the Revdoku page shows Tool permissions and a Disconnect button.
-
Open a new chat. Click + → Connectors and turn on Revdoku. Then ask:
Show my Revdoku buckets, the address of each docs site and the open support tickets.When Claude asks for permission, approve the reads.
-
Ask Claude about your site, for example:
Is my docs site live? Show its address and its access mode.
A web connector, not a desktop extension
Claude Desktop has two kinds of connectors. A desktop extension runs on your computer and works with local files or apps. A web connector (also called a remote connector) is a cloud service that Claude connects to. Revdoku and the MCP server of each docs site are web connectors. You do not install an extension or edit a configuration file in Claude Desktop. After you connect Revdoku in one Claude app, it works in the other Claude apps without more setup.
Add a docs site instead
Each public Revdoku docs site has its own MCP server at /mcp. MCP is a standard way for AI apps to use outside tools. The docs server is read-only and needs no sign-in, so you do not need a Revdoku account for it.
- Open Customize → Connectors. Click + Add → Add custom connector.
- Type the name of the docs, for example
Acme docs. As the URL, type the site address with/mcpat the end, for examplehttps://docs.example.com/mcp. Click Continue. - Under Authentication, select No sign-in. Claude then does not show the OAuth client setting.
- Click Add.
- In a new chat, click + → Connectors and turn on the docs connector. Then ask a question that the docs answer.
Claude gets three tools: search_docs, read_page and list_pages. They only read the published pages.
A Free Claude account can have one custom connector. With it, add a docs site or your Revdoku account, not both.
Add Revdoku for a Team or Enterprise organization
On Team and Enterprise plans, an Owner or Primary Owner adds the connector once for all members:
- Open Organization settings → Connectors.
- Click Add, point to Custom and select Web.
- Do steps 3, 4 and 5 of the first list on this page.
Each member then opens Customize → Connectors, finds Revdoku and clicks Connect. Next, each member does steps 7 to 9 with their own Revdoku sign-in. An owner can add a docs site for the organization in the same way, with No sign-in.
If the connector does not work
- If Claude shows an error for a saved connector, open Revdoku Account → Access and click Reconnect Claude.
- If you must change the name or the URL, remove the connector in Claude. Then add it again.
- If a chat does not show the Revdoku tools, turn on Revdoku under + → Connectors in that chat.
- If a docs connector shows no tools, make sure that the site is public and that the URL ends with
/mcp.
 Claude Help Center: custom connectors · Claude and your docs · Docs for AI agents · Revdoku MCP guide
A docs portal with Ask AI
and support tickets
Connect a repository, or describe your product to start. Each docs site has search, Ask AI, an API console, an MCP server and support tickets.
- Publishes from GitHub on every push
- Works with Mintlify repositories
- API console from your OpenAPI file
- MCP server and llms.txt for AI agents
- Ask AI and support tickets
- Analytics for people and AI agents